For some reasons, you may need use VPN service. If you do not have a VPN provider, you can install your own PPTP VPN server on Linux machines in about 5 minutes. This post gives step-by-step guide on how to install and configure a PPTP VPN server on Redhat, CentOS and Ubuntu. It should also work on SUSE, Fedora and many other Linux distros.
In this post, I will share with you how to connect to the PPTP VPN server from a Windows machine. I will use Windows 7 Home Premium as an example.
Step 0: Make sure you have a PPTP VPN account.
The information needed includes: PPTP VPN server IP, user name, and password
Step 1: Connect to internet
To connect to a VPN server, you must connect to internet first, because normally the VPN server is not in your local area network. You can connect to internet with cable or wireless. PPTP VPN has no issues with wired or wireless connections.
If you can read this post, it means you are connected already.
Step 2: Open control panel
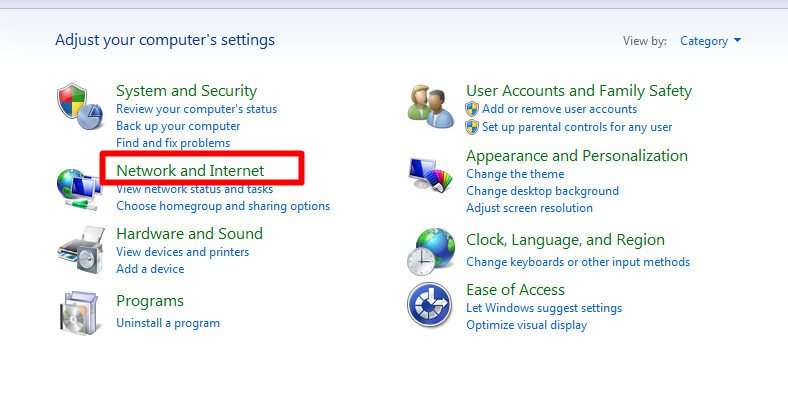
On your Windows machine, go to Start (the button in the bottom left)–Control panel. You should get a window similar to the following screenshot (click the image to enlarge). Click the Network and Internet as illustrated
Step 3: Add a PPTP VPN connection
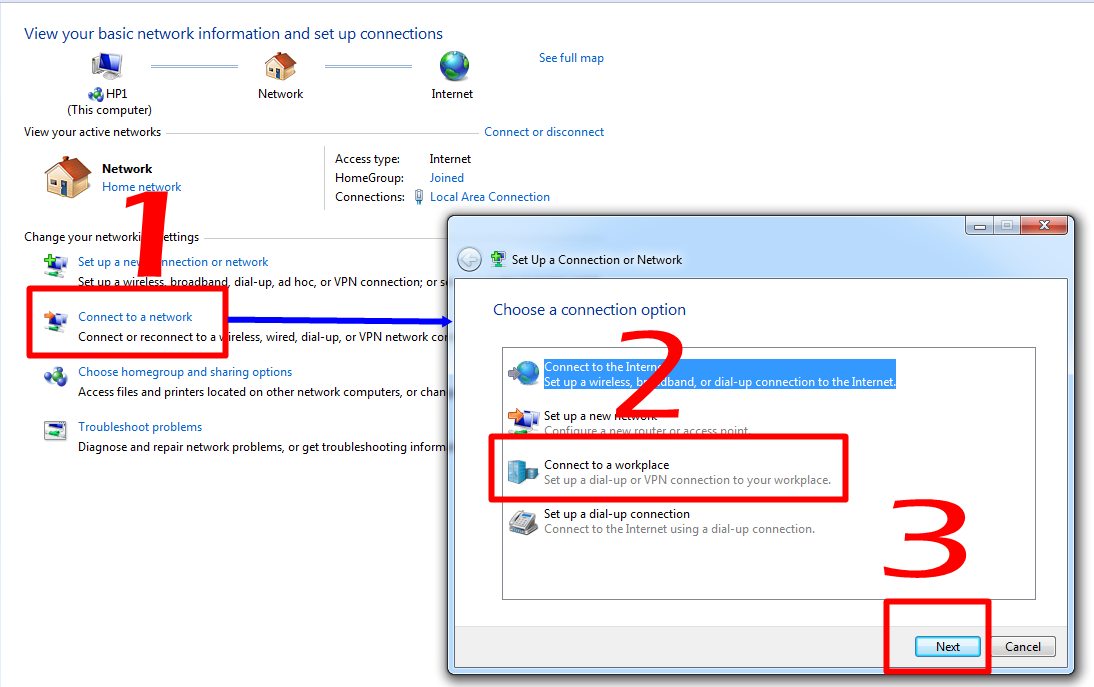
After clicking the Network and Internet, in the new window, click “connect a network”, then in the pop-out window, click “connect to a workplace” (make sure you click this one!!). Click Next to proceed. You may refer to the screenshot below (click the image to view the full-sized image).
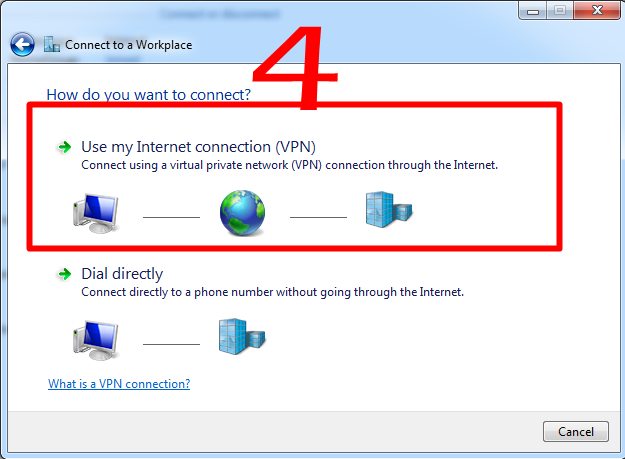
In the pop-up window, click “Use my Internet connection (VPN) as shown below.
Step 4: Provide PPTP VPN server IP or hostname
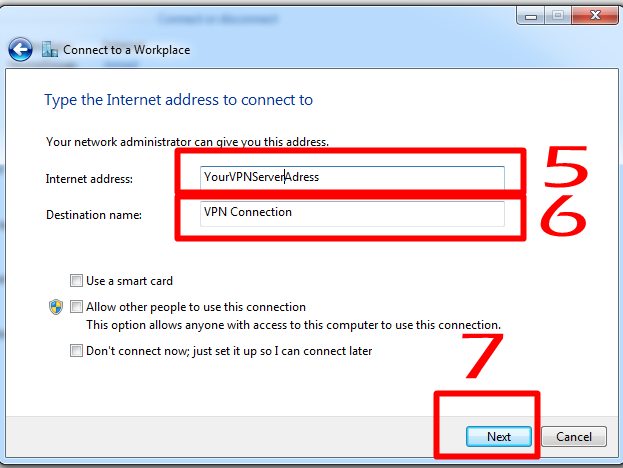
In the new window, you are asked to provided the ip address (hostname is also acceptable) of the PPTP VPN server. You can get such info from your VPN service provider. If you installed the PPTP VPN server yourself, you can put the server IP here.
Optionally, you can change the destination name of this VPN connection (illustrated as 6 in the screenshot below). This is just for your own info. You can type whatever you want.
Then click Next to continue.
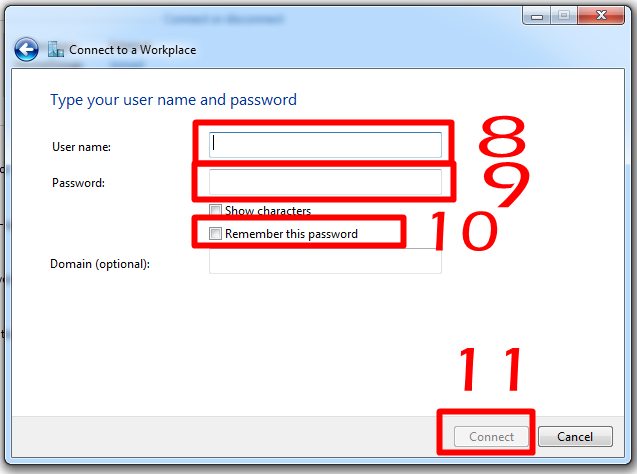
Step 5: Provide your PPTP VPN account info
In the new window, you need provide the user name and password of your PPTP VPN account. You should get such info from your VPN service provider. If you set your own PPTP VPN server following this guide, you can add an user name and password in /etc/ppp/chap-secrets .
If you are the only user of the computer, or you are willing to share the PPTP VPN account with other users in the computer, you can check “Remember this password” so that it is necessary to type the password next time. If you do not want to store password in the computer, do NOT check it.
Then click “Connect” to connect to the VPN.
These are illustrated in the screenshot below. Click the image to view the full-sized image.
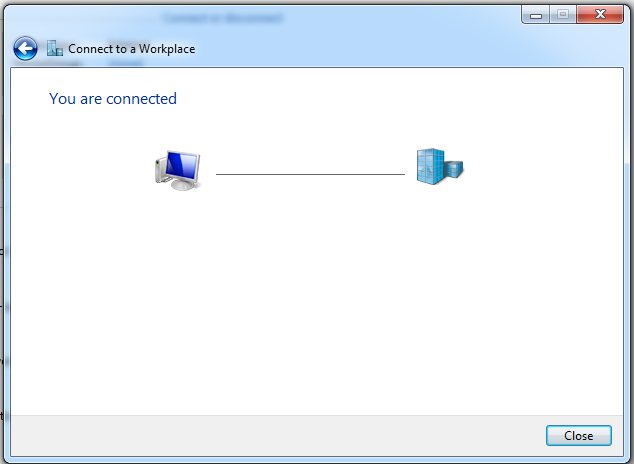
After 1 or 2 minutes, you should get the following screen:
Step 6: Test the connection
Open your browser, go to whatismyip.com to see whether your IP is changed to the PPTP VPN server IP.
Get any problems? Share with us in the comment box below! (please do NOT post any account info or personal info).

If you are the only user of the computer, or you are willing to share the PPTP VPN account with other users in the computer, you can check “Remember this password” so that it is necessary to type the password next time. If you do not want to store password in the computer, do NOT check it.